
If you have access to computers running different operating systems, you know that switching external hard drives between them can be a pain. Windows 11 PCs use NTFS for their file system, while the best Macs use Apple File System (APFS). While there are some file formats that both operating systems can access, like ExFAT, what happens if you’ve got important data on a drive formatted as NTFS, but you need to access it on a Mac? Well, you might be in luck because macOS can mount and read data from NTFS drives, but it can’t write any data to them without some additional work. Let’s fill in the missing pieces and get NTFS support working both ways on Mac.
What you need to enable NTFS drives on Macs
While macOS allows you to mount and read data from NTFS drives, you’re limited in that you can’t write data to them. That’s because Apple doesn’t have the necessary license to use NTFS-formatted drives, as the file format was proprietary to Windows computers. That doesn’t mean you can’t get write access if you need it, as several third-party developers have created tools to do so. The process is fairly involved, even if you pay for one of the third-party apps, so be aware you might be running commands in the Terminal, downloading and installing various third-party apps, and it will take some time.
All you need to get ready to start is a couple of things:
- A stable internet connection to download some files
- The admin password for your Mac
It’s worth noting that any of the methods for mounting NTFS disks on a Mac with read/write permissions can result in data loss. If you need to swap an external disk between Windows and macOS often, we recommend formatting it as ExFAT, so both computers can access it properly.
Using a third-party app to mount NTFS disks
You have options, most of which are paid

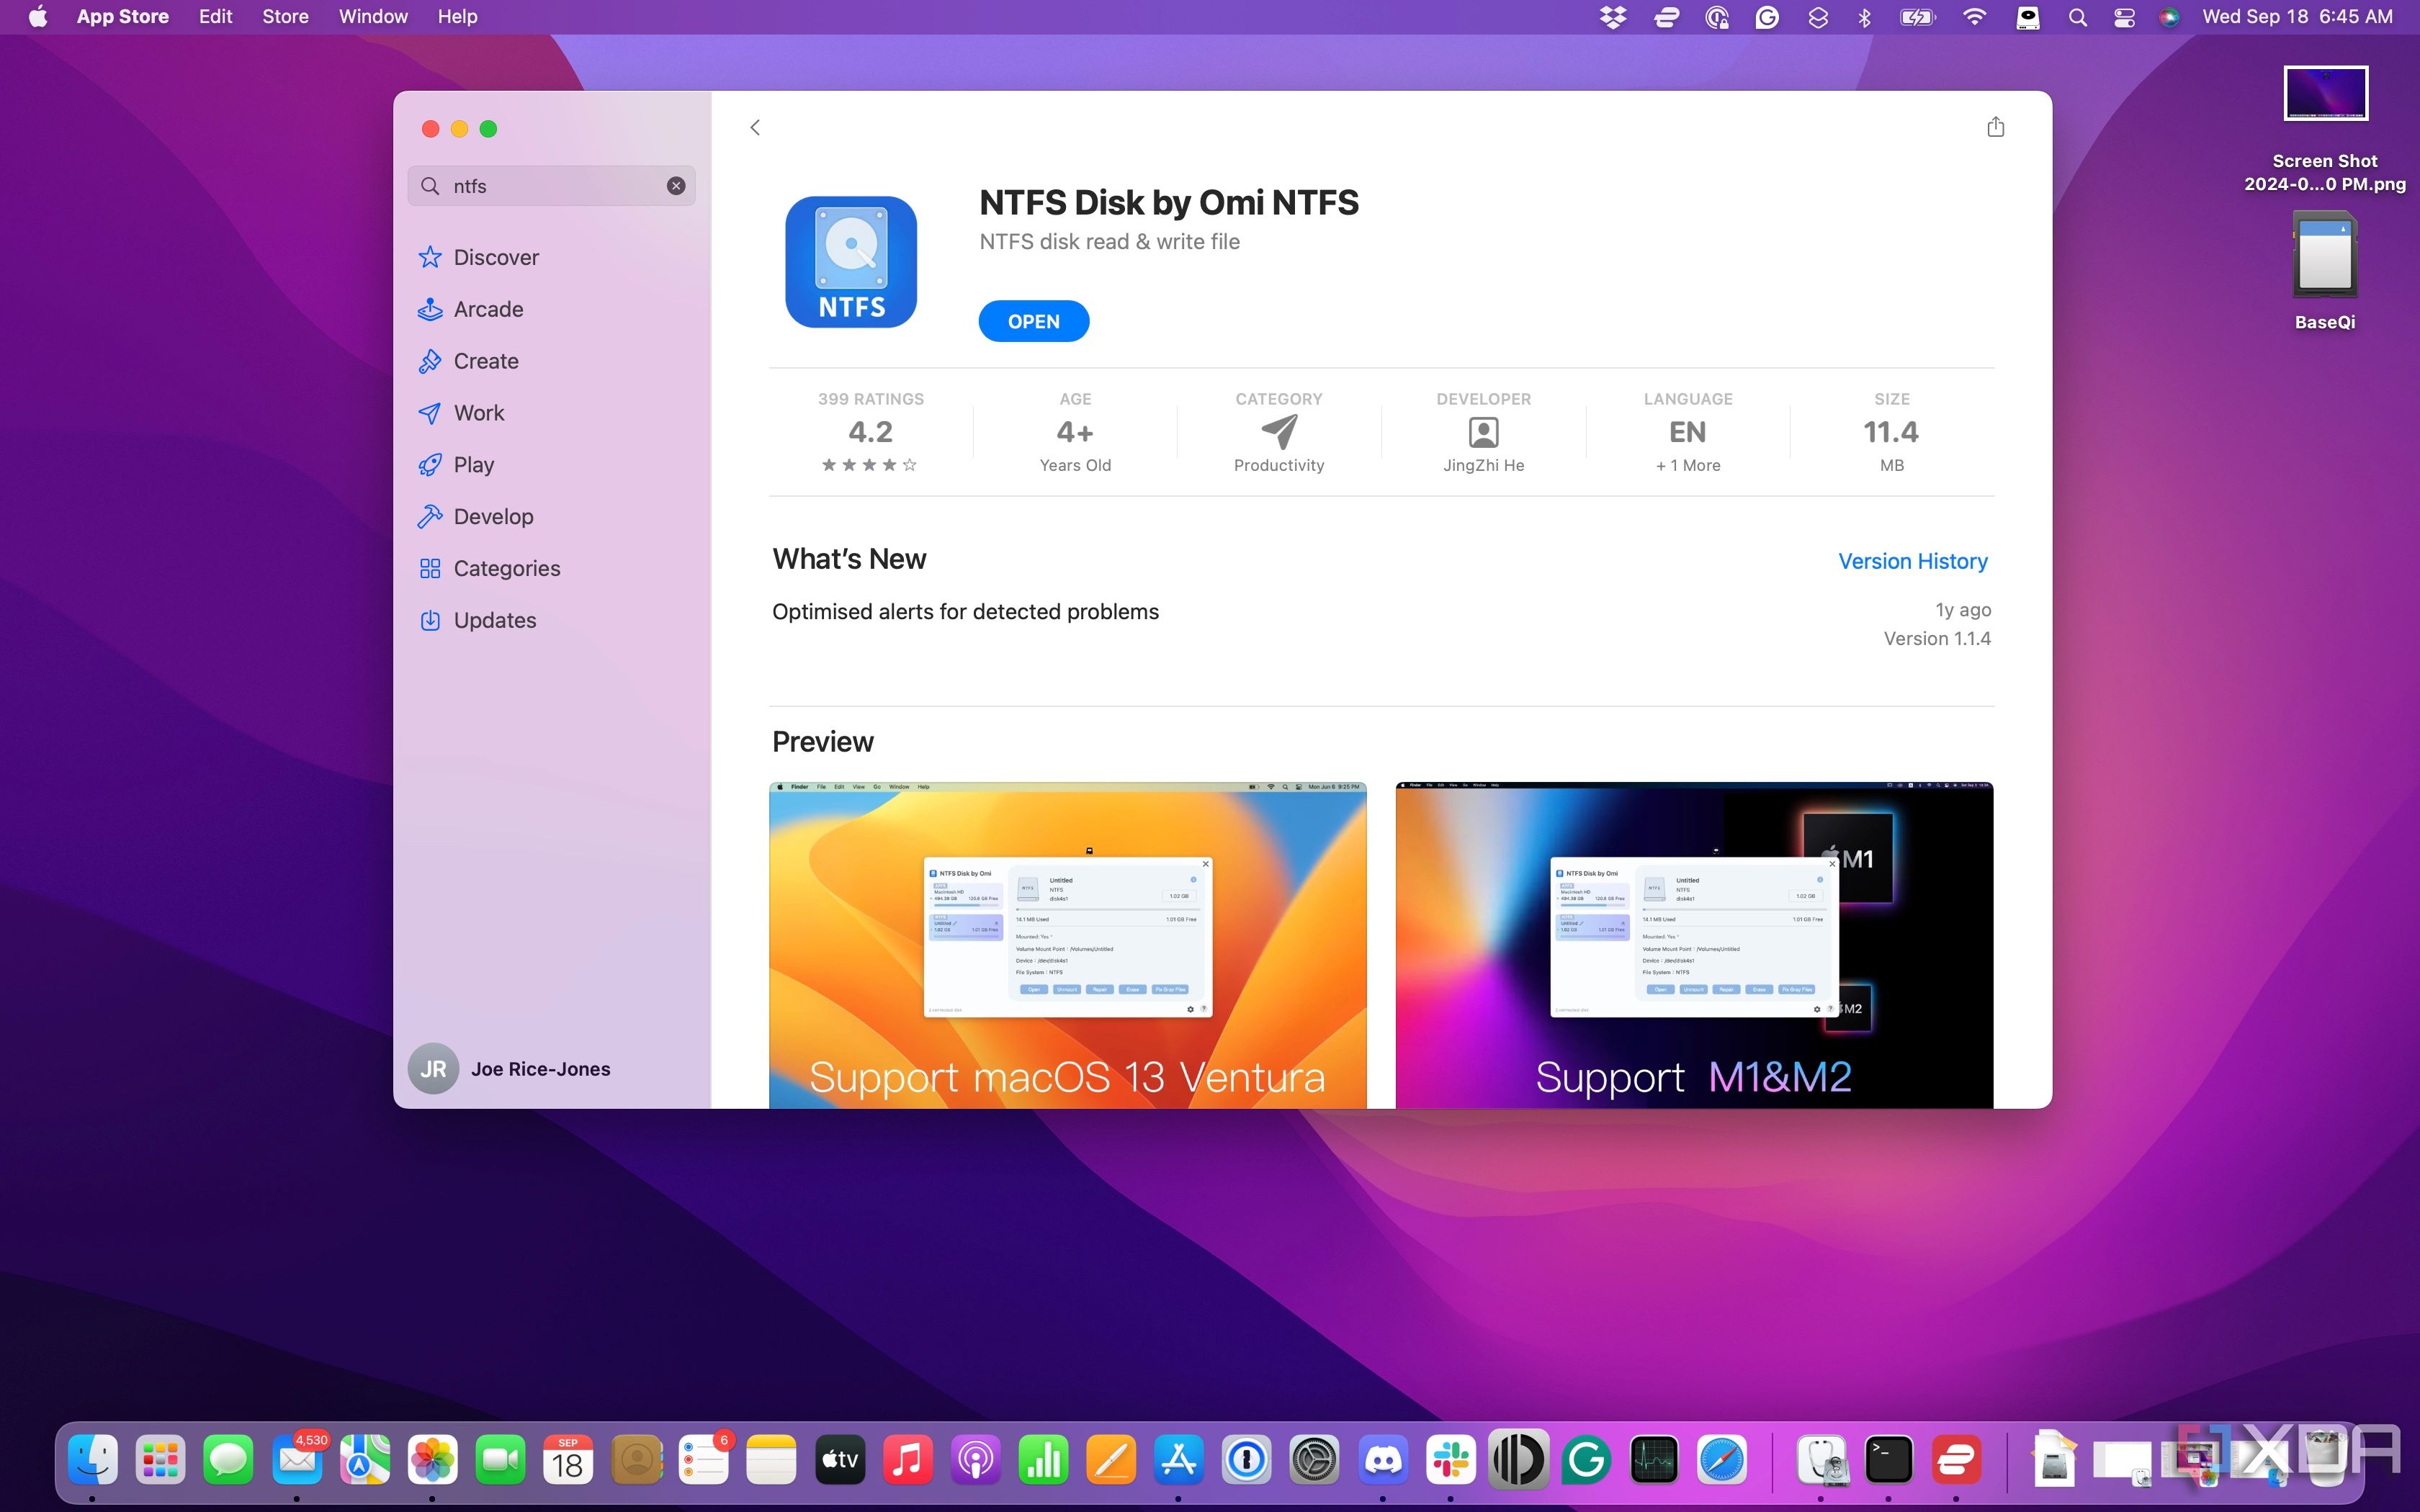
To enable NTFS read/write permissions on macOS, we need to install some third-party software. That’s because Apple removed the built-in mechanism for re-mounting NTFS drives in macOS Ventura. While there are some free options, like Mounty, most of the tools for mounting NTFS drives in macOS are freemium, with a short trial period and either a weekly, monthly, or lifetime fee to unlock the full app. All the apps in the App Store when you search for “NTFS” work in similar ways, so once you find the one you like, it’s worth getting the lifetime unlock.
We used NTFS Disk by Omi for this guide, but other good options include iBoysoft NTFS, Paragon NTFS for Mac, or Microsoft NTFS for Mac by Tuxera. The free option mentioned earlier, Mounty, is easiest if you install Homebrew and follow the Terminal commands found on the Mounty website. Homebrew needs macOS Ventura (13) or higher, so unfortunately, we couldn’t get this method working on our Intel-based MacBook Pro (maybe it’s time I upgraded).

NTFS Disk by Omi NTFS
Mount NTFS disks on macOS quickly and easily. Use the free trial to confirm it works, then it’s $20 for a lifetime license.
Users of Intel Macs can skip down to the installation steps. For Apple Silicon users with M-chips, you’ll need to enable user management of kernel extensions first.
Enabling kernel extensions on Apple Silicon MacsFor Apple Silicon users, you’ll need to enable system extensions for the NTFS mounting apps to work properly. That means loosening your device’s security restrictions. You’ll want to consider whether this is worth it or if you are going to use another file format for your external drives so you can use them more easily on macOS.
- Turn your Mac completely off.
- Press and hold the power button until the screen says Loading up startup options (this takes around 10 seconds).
- Select Options and then Continue to boot your Mac to Recovery Mode.
- Open the Utilities menu at the top of the screen, and select Startup Security Utility.
- Select Security Policy… when you see the startup disk.
- Once the Utility opens, select Reduced Security and Allow user management of kernel extensions from identified developers.
- Approve the change by selecting OK and entering your admin password before restarting your Mac.
Installing the third-party NTFS app
Now it’s time to get the app that will enable read/write mounting of NTFS disks installed.
- Open the App Store and search for NTFS.
- Select NTFS Disk by Omi NTFS and install it.
- Once installed, open the app. It will ask you to install a helper app, which is necessary for the sandbox method that these apps use.
- Open System Settings (macOS Ventura or later) or System Preferences (macOS 12 or earlier), navigate to Privacy & Security, and select Allow next to the message “System software from developer Omi Software Studio Inc. was blocked from loading.”
-
If your macOS is older than Ventura, like mine, you’ll also want to go to the Privacy tab, scroll down to Full Disk Access, and select the box next to the com.omi.ntfs.HelperTool so it can work.
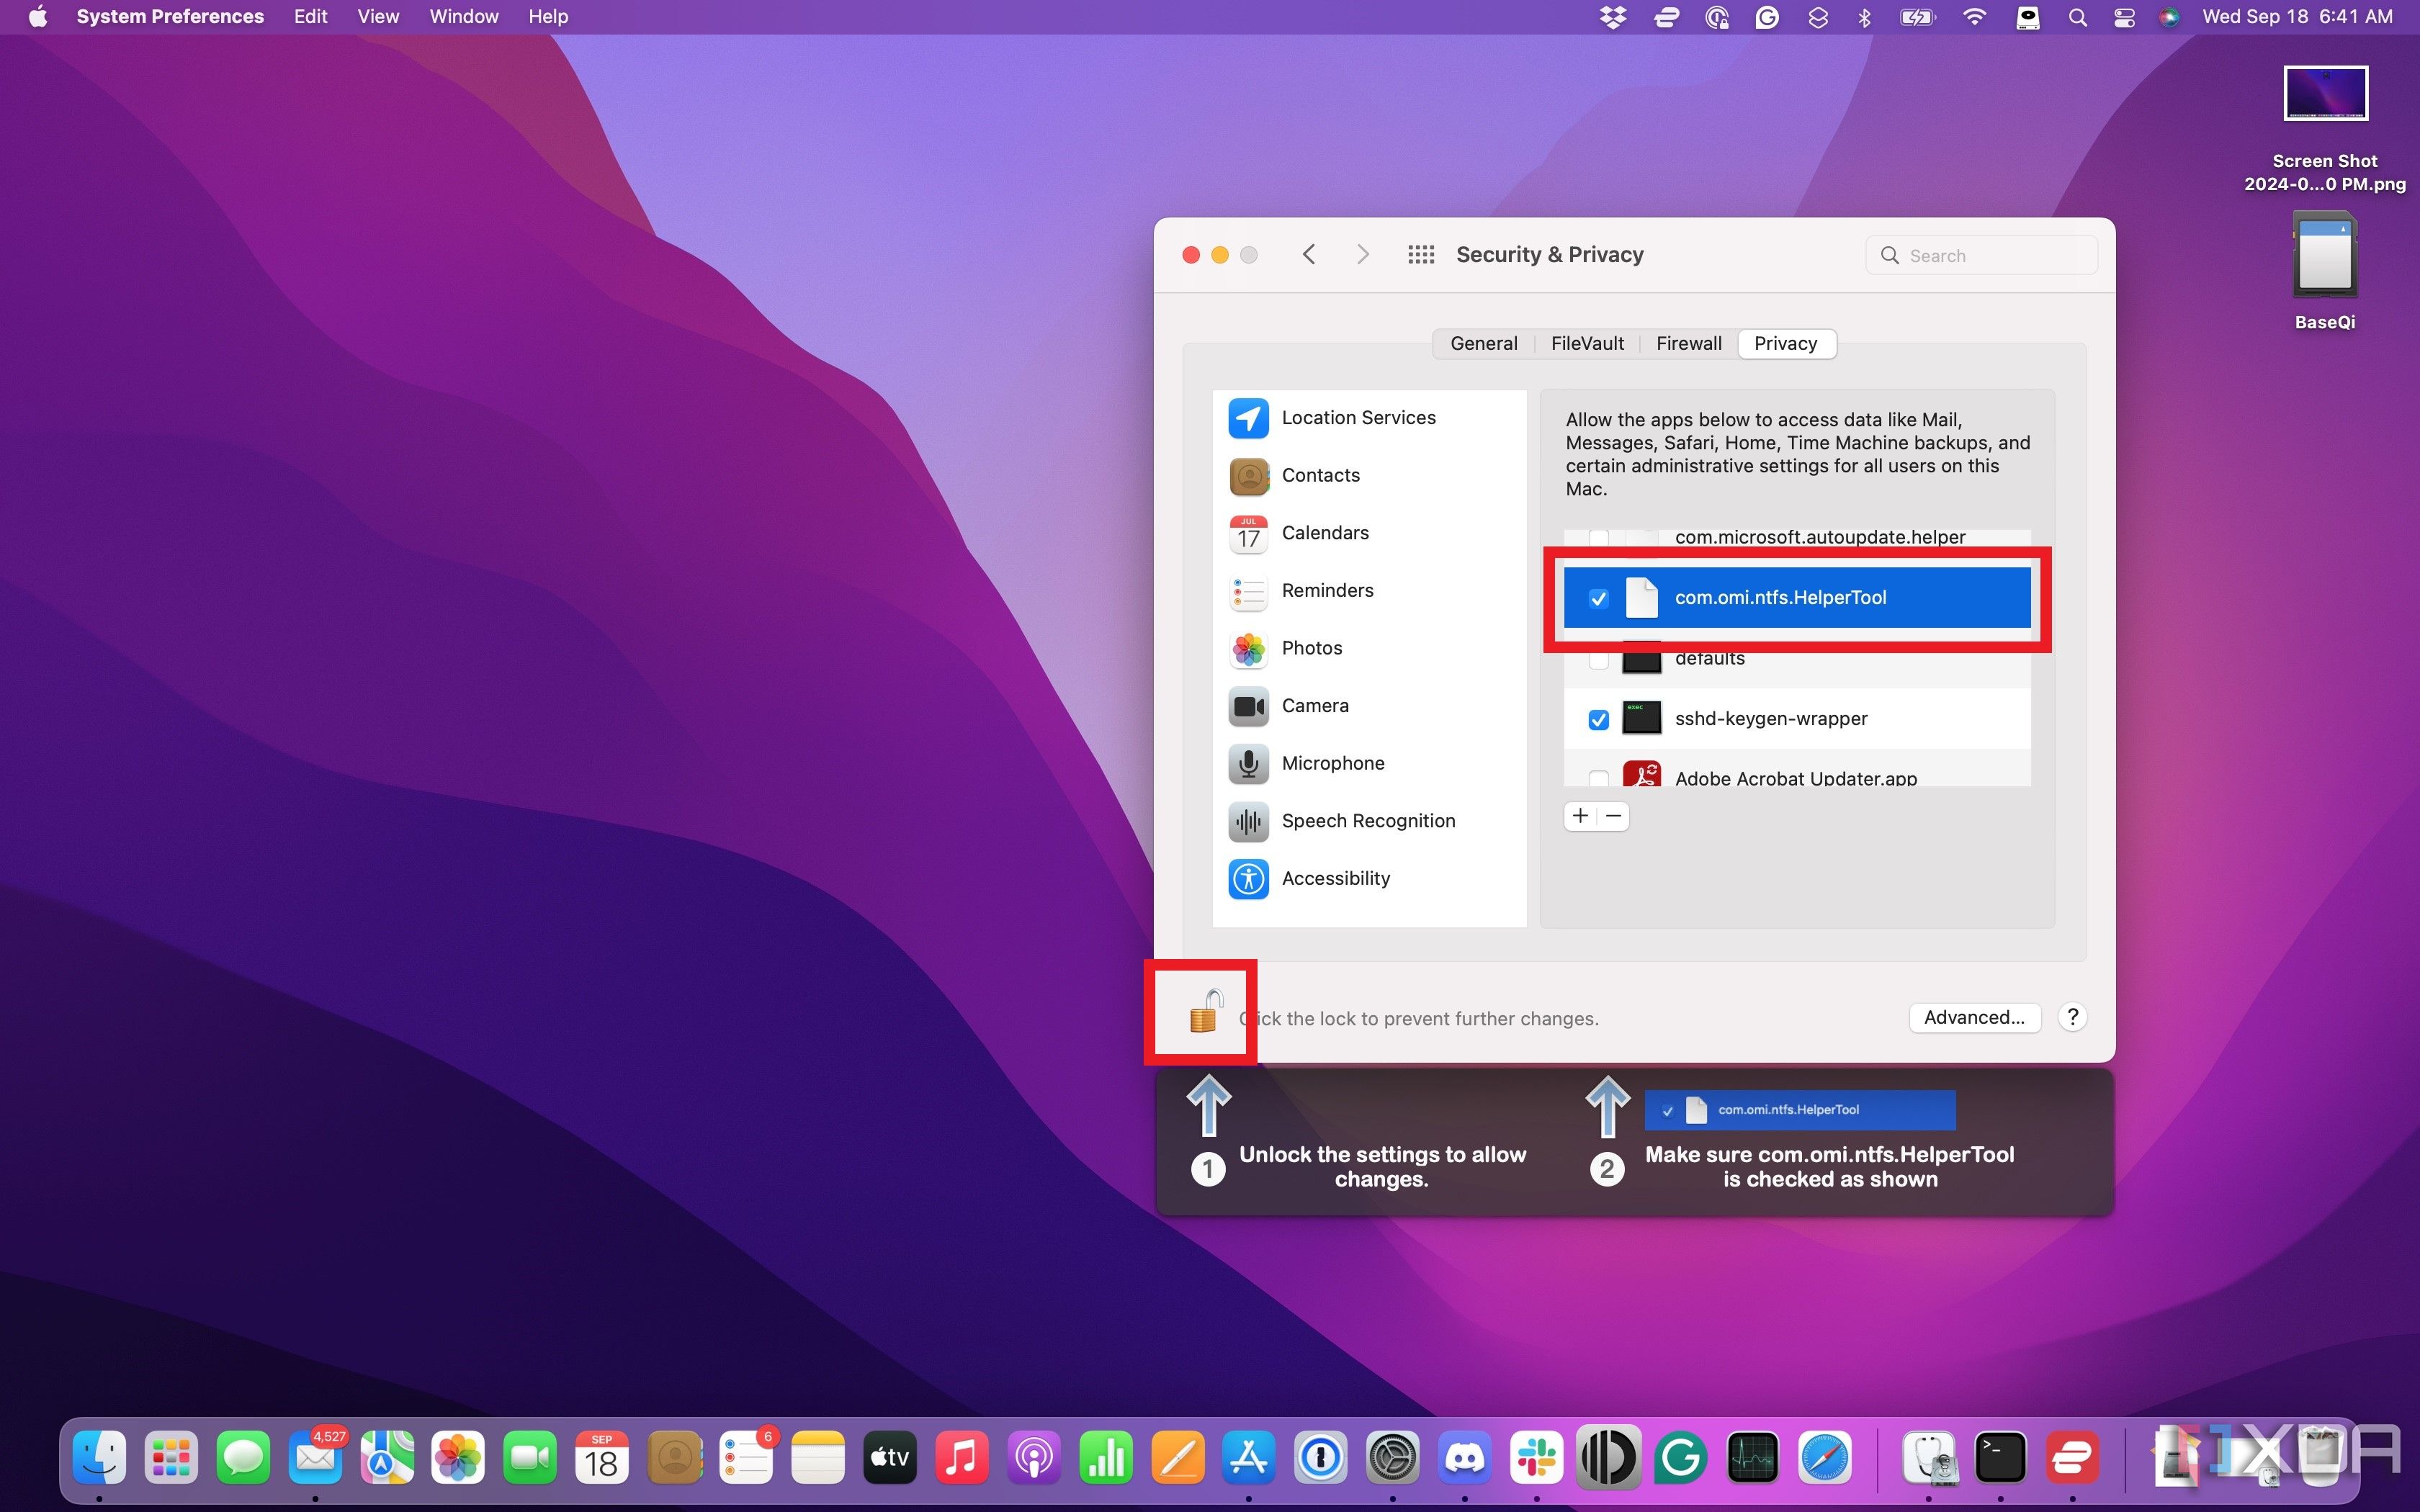
- Reboot your Mac.

Once you return to the desktop, you’ll see a disk icon for Omi NTFS Disk on the taskbar. Clicking on this will open an applet showing all the disks attached to your system and the file system used. Select the NTFS disk you want to mount and select Mount from the options. This will open the disk in Finder, with full read/write permissions.

Using NTFS-formatted drives with macOS isn’t the best way to transfer data
While there are plenty of utilities for adding NTFS support to macOS, all of them come with drawbacks. The risk of data loss is the biggest issue, but it’s also slower to transfer data using NTFS on Macs, as the system isn’t designed for it. Once you’ve transferred the data off your NTFS drive so it’s safely on your Mac, it’s time to think about reformatting that drive to ExFAT (if you still need to use it with other systems) or APFS if you’ll only use that external drive with Macs from now on.


