How to Capture Mac System Audio for Free (and What You Can Do With It)
Key Takeaways
- Use Blackhole to route desktop audio back into your Mac for streaming, communication, or creative purposes.
- Configure Blackhole by selecting which sources you want to include, then select the new audio device you’ve created in your app of choice.
- Alternatively, Loopback is a pricey yet arguably more user-friendly premium alternative to Blackhole.
Your Mac’s built-in audio capabilities are pretty extensive, but capturing audio output directly isn’t so straightforward. Here’s how to use the free open-source tool Blackhole to route your desktop audio for streaming and sharing at full fidelity.
Why Would You Want to Do This?
“Looping back” audio means routing sounds that are played on the computer as output back into the computer itself as an audio input. This technique is useful for several common usages:
Higher Quality Livestreams
Streamers can enhance their audience’s experience by delivering high-quality audio directly from the source, rather than relying on microphones picking up sound from speakers, which can result in reduced audio fidelity.
Sharing System Audio at Full Fidelity
Whether in professional settings like Zoom or casual ones like Facetime, sharing source-quality audio can greatly improve communication and shared experiences. If you are a creator, you’ll no doubt be able to conceive of myriad uses for high-quality system audio in your project workflows and presentations.
Creative Endeavors
If you’re making music, sampling audio, or working on similar creative projects then you might encounter situations where you want to capture your entire system’s audio.
So how do you do it?
Download and Install Blackhole
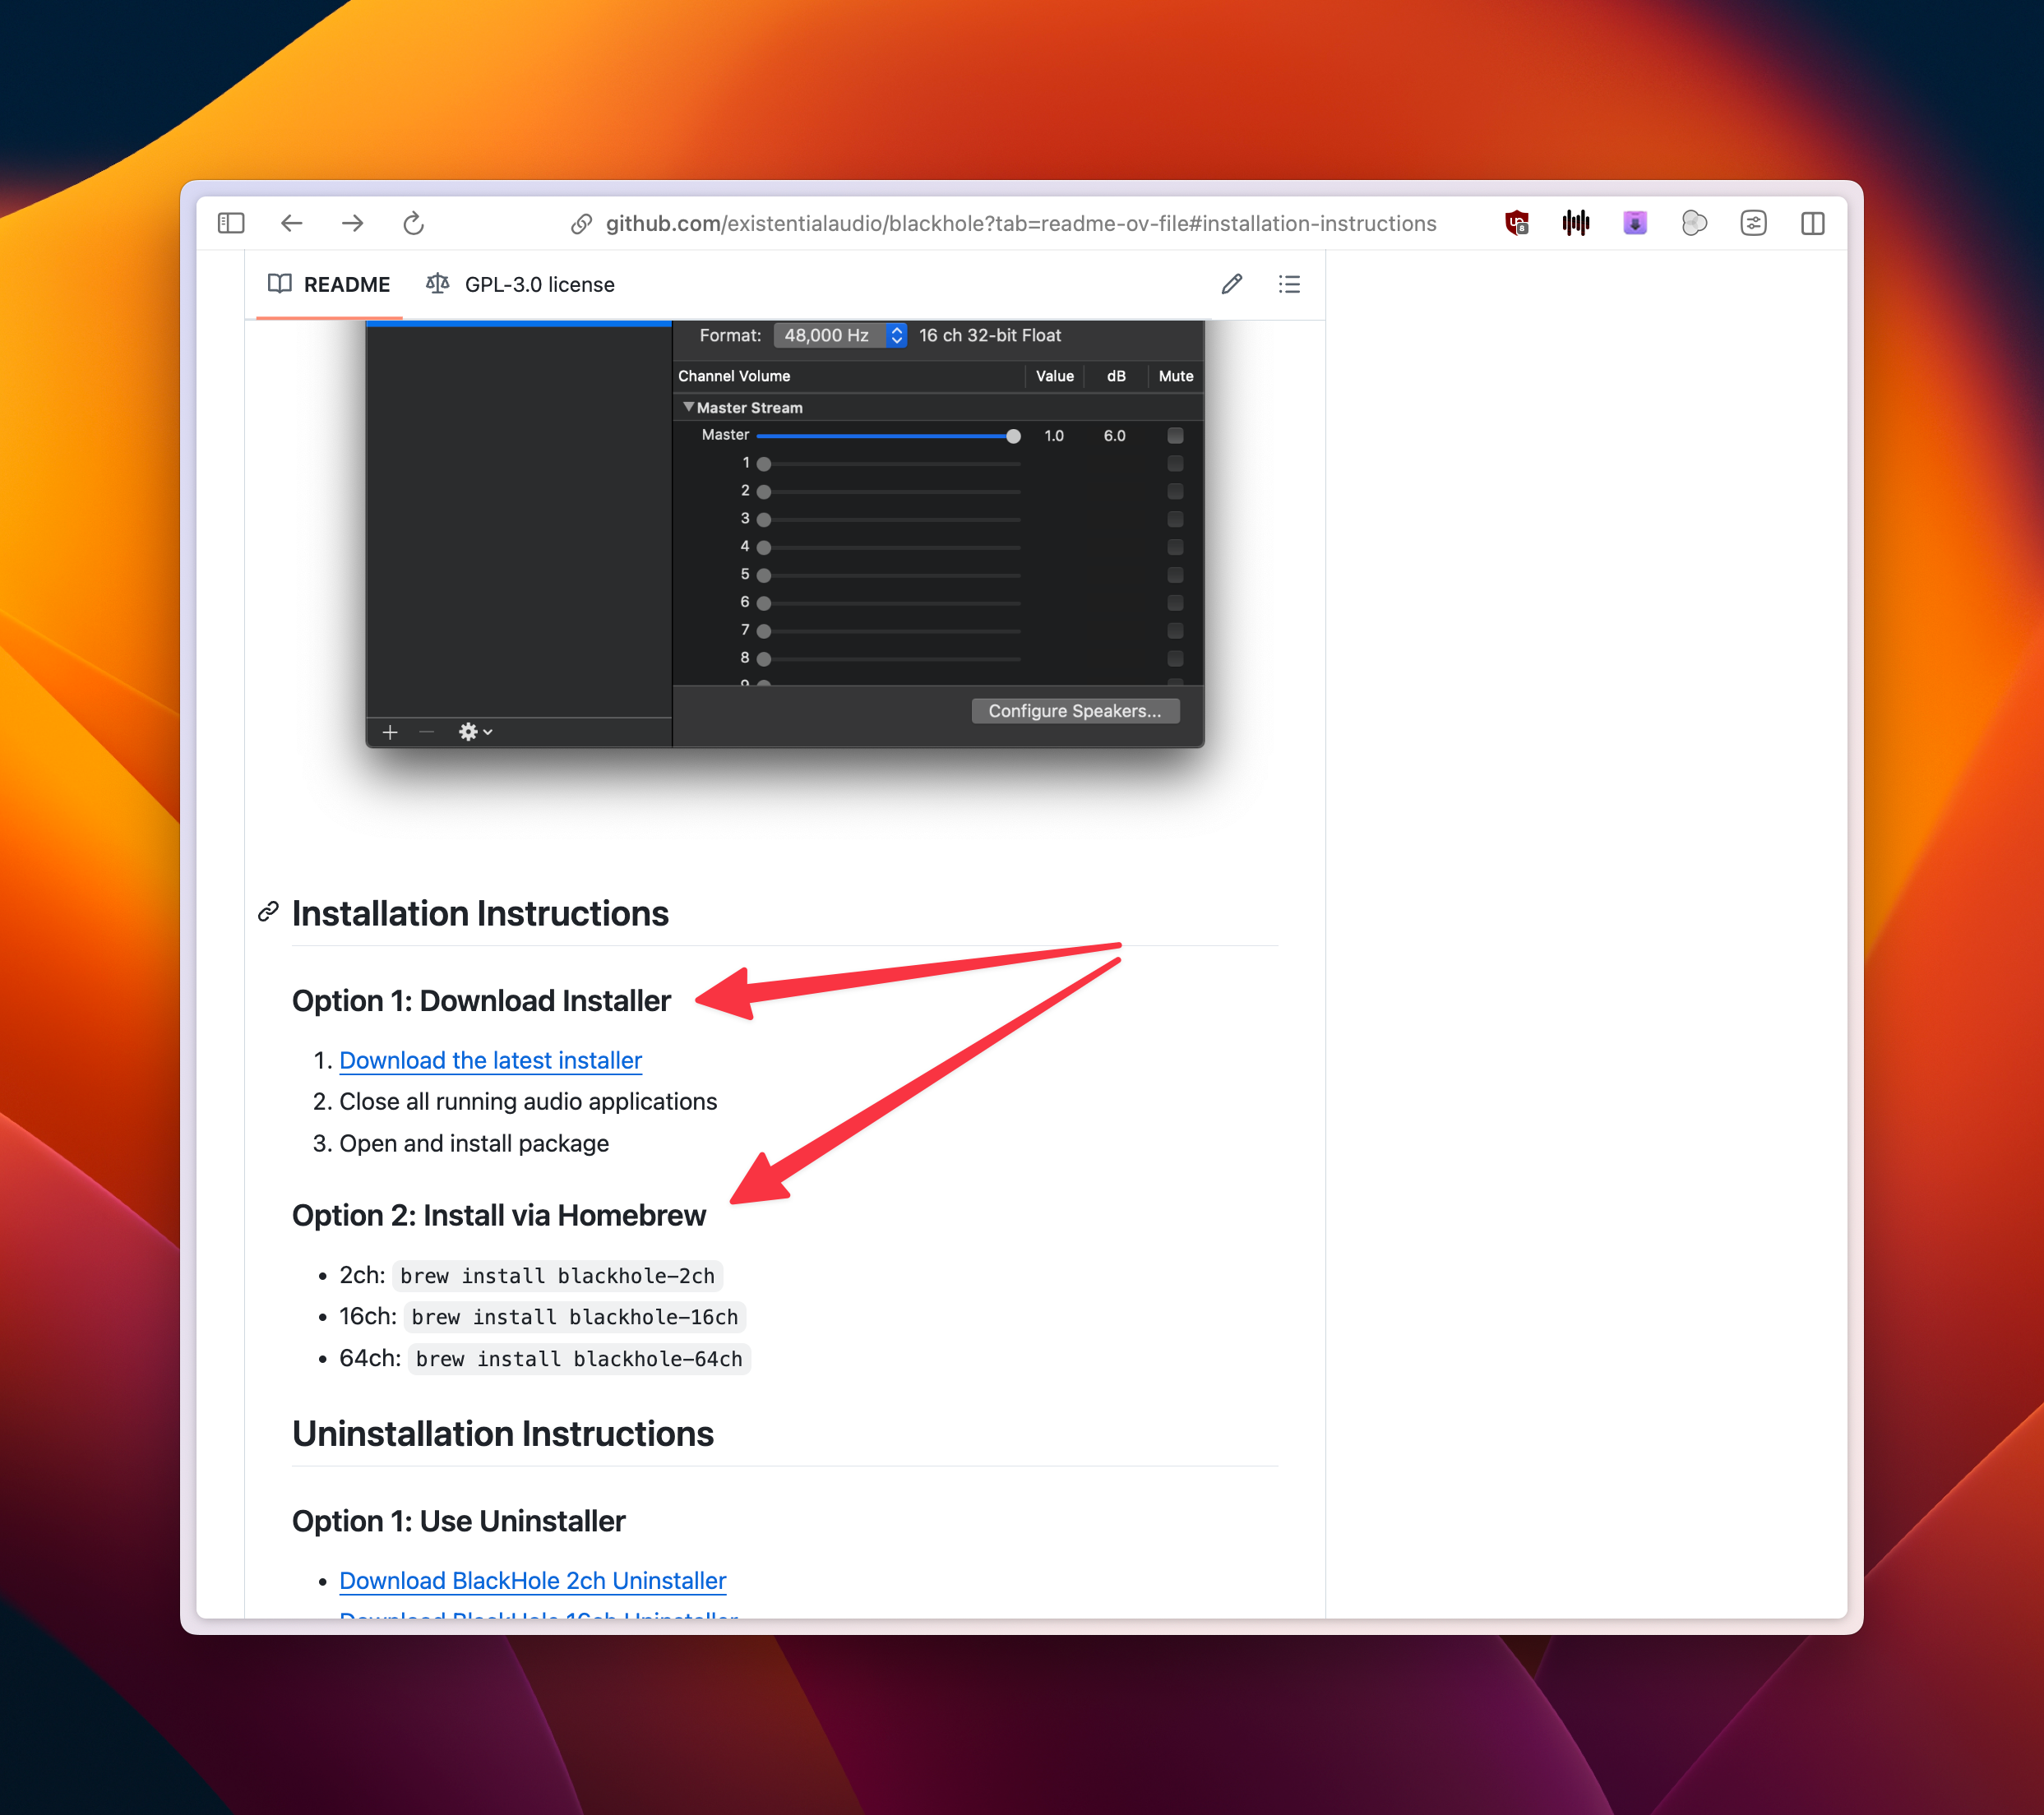
Visit the Blackhole GitHub page and scroll down to the “Installation” Instructions section and choose from one of the options shown (downloading the current installer package or installing using Homebrew).
Make sure to select the correct version (2-channel all the way up to 64-channel) based on your specific use-case needs. For the vast majority of streamers and content creators, the 2-channel version will suffice. Go with this unless you really know what you’re doing
After installation, you’ll need to grant the necessary permissions, which may include accessibility and microphone access. After you’ve done so, reboot your Mac.
Configure Audio Devices
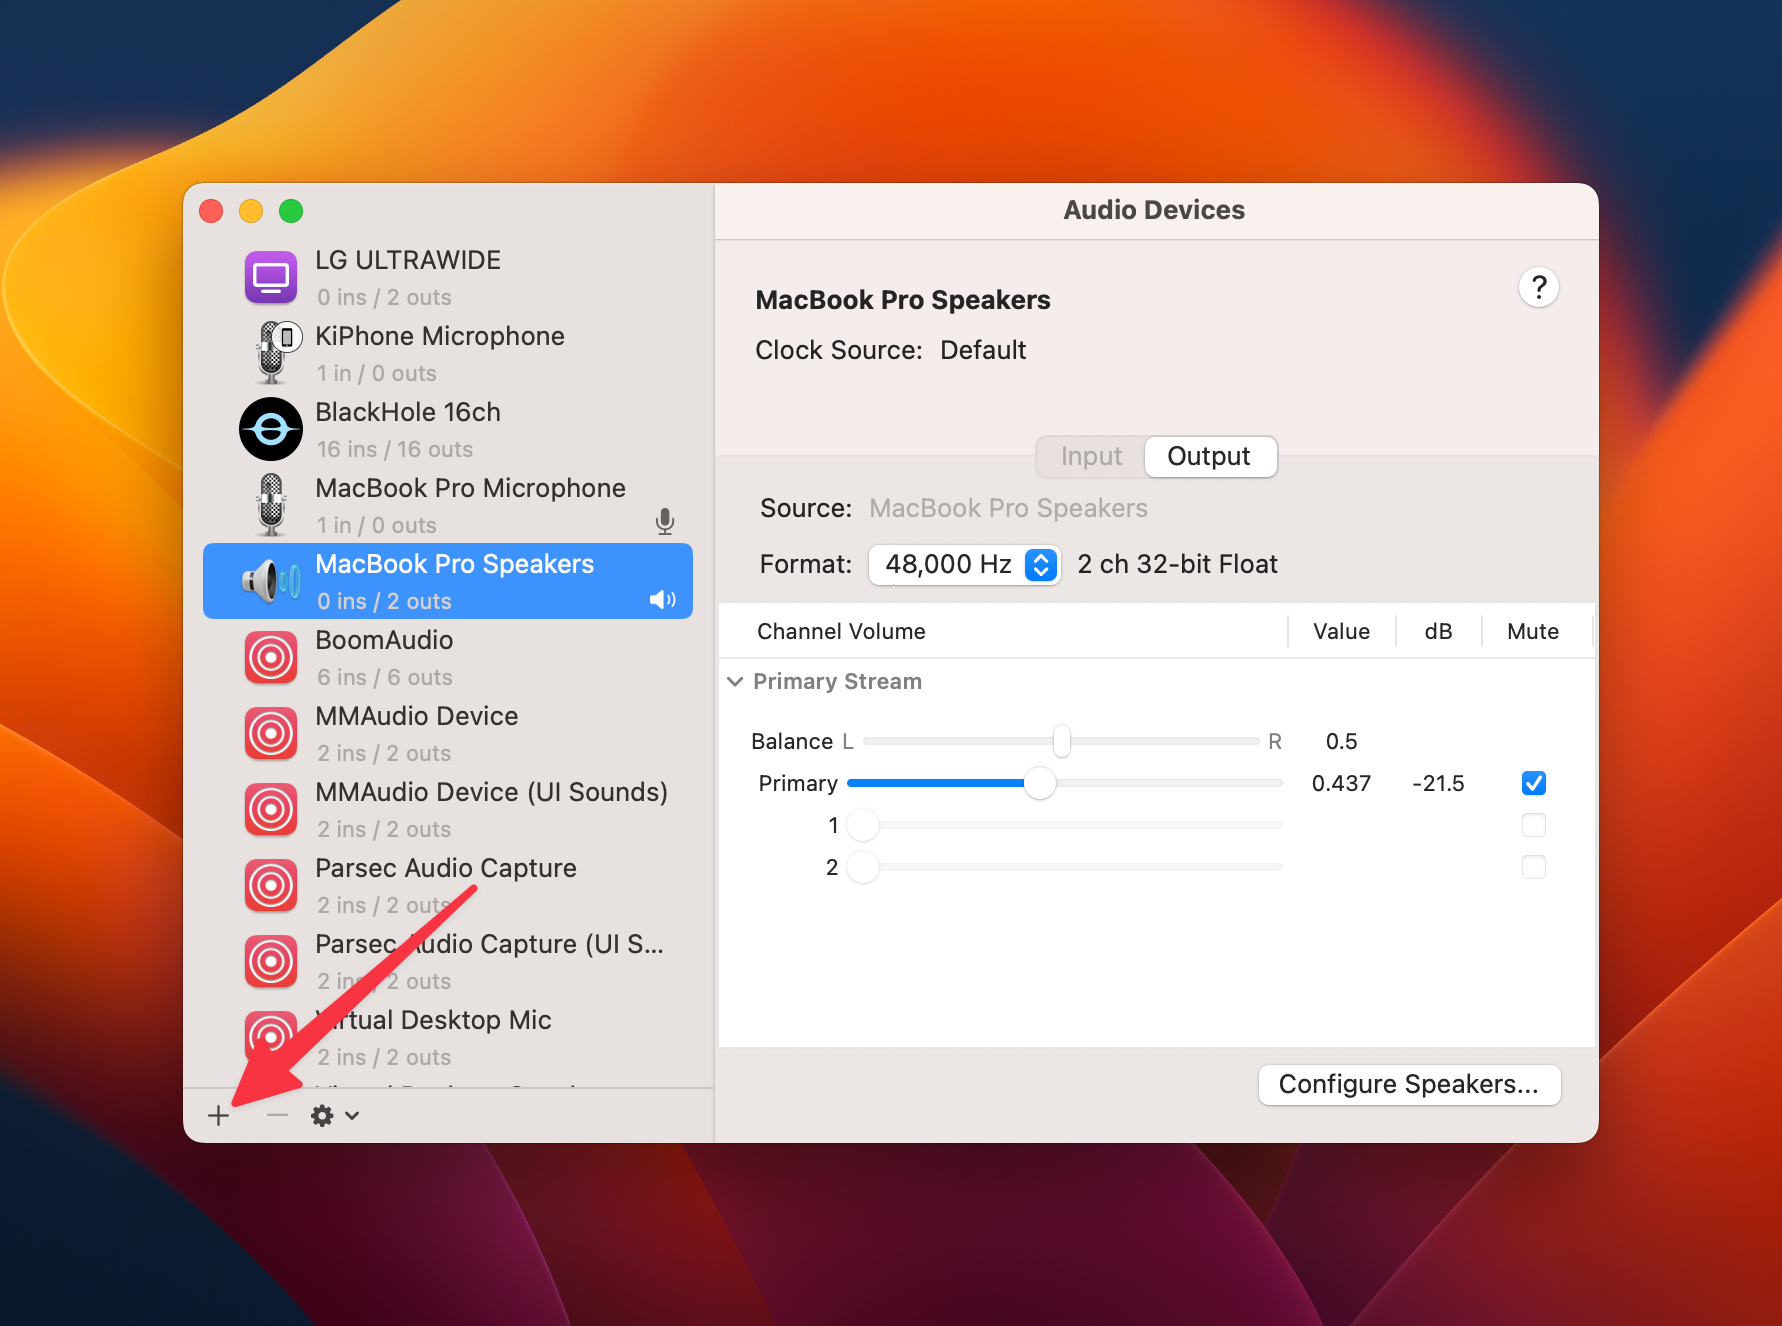
Once Blackhole is installed, you need to configure it to handle audio output. To do that, let’s first, open “Audio Midi Setup” which you can find in Applications > Utilities or launch via Spotlight.
Now create a new device by clicking the plus icon located at the bottom left corner of the Audio Devices window and choosing Aggregate Device from the dropdown menu that appears.
It should be noted that you can also create a Multi-Output Device, but this should only be done for the purposes of using with applications in which you are allowed to choose multiple audio input or microphone devices (like OBS or Streamlabs).
For more common communication apps, you need to use an Aggregate Device so that you can tie in your actual mic to the output you will be using in Facetime, Zoom, and so on.
In your newly created Aggregate device, check the boxes for your normal output device (like Built-in Output), Blackhole, and any other sound sources you want to tie into this audio input, like your system’s onboard mic. This setup allows you to hear audio through your speakers or headphones while simultaneously routing it (as well as your mic input, if enabled) to Blackhole.
Using Your Newly Configured Loopback Device
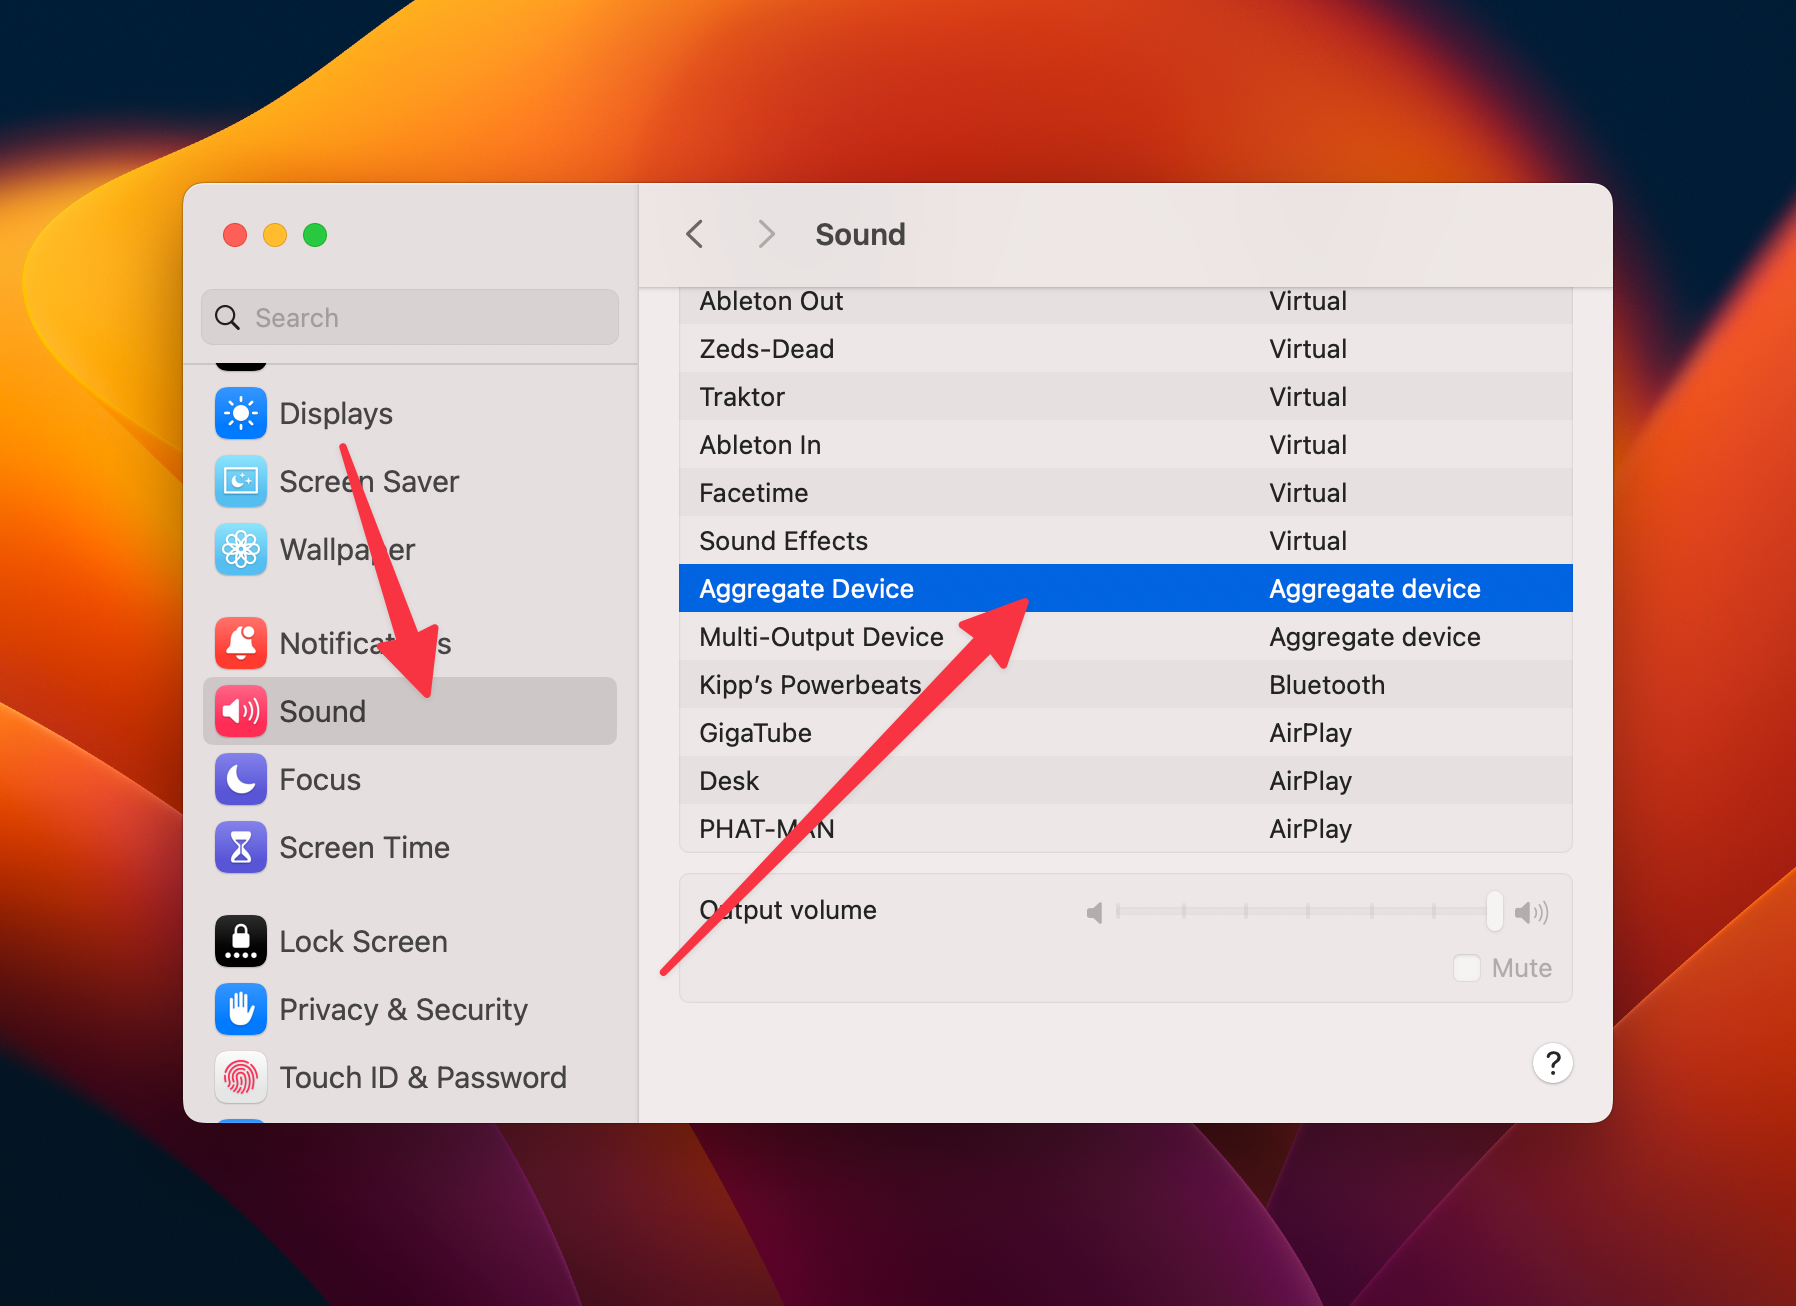
In both of the following use cases, you’ll want to select your Aggregate Device as the output in System Settings, like so:
For Streaming
Set your Aggregate Device as your sound output in System Settings and as one of the audio inputs in your streaming software. This configuration routes all Mac sounds to your stream.
For Communication
In more common professional and casual video conferencing apps like Zoom, Skype, and Facetime, select the Aggregate Device as your microphone. This setup will transmit any audio playing on your Mac to your call participants, ideal for sharing high-fidelity audio clips or music.
To balance the relative volumes of your audio applications with your microphone input, use the play-integrated volume slider in whatever video or music player you may be using.
Honorable Mention to Loopback (Paid Alternative)
Blackhole offers a robust, free solution, but I would be remiss not to mention the paid app Loopback ($109) from Rogue Amoeba. Loopback provides an arguably more user-friendly interface with advanced features. That said potential users should note that major macOS updates can sometimes disrupt functionality, requiring updates, reconfiguration, or periods of plain, unavoidable non-usability. It’s also pricey.
Routing Mac’s desktop audio directly into streams or communications platforms enhances the quality of your output and the overall experience for your audience. Blackhole provides a free, effective solution for users needing straightforward audio routing capabilities. Use it as a permanent solution or as a method of previewing the capability before taking the plunge into paid options!


