Sunny weekends in late September and October are prime time for garden clean up. But once you’re done raking and mowing, don’t put those leaves, grass and garden clippings in the trash. Use them to make compost.
The process isn’t difficult, and the benefits to your soil are great: improved drainage, increased air- and moisture-holding capacity and higher nutrient levels.
Composting is nature’s normal recycling process, just speeded up. Organic materials like those leaves and garden trimmings, plus food waste, are mixed together, along with water and air.
Over a period of months the mixture breaks down into a substance that helps your garden stay healthy and productive.
To Get Started
First, find a place to put the pile. The site can be in sun or shade, but should have good drainage. The ideal spot is somewhere easy for you to get to, and not too far from a water source.
Compost piles aren’t particularly attractive, so you may want to tuck it away somewhere. Just be sure the area has good air circulation.
While you don’t have to buy a bin or structure, enclosing the pile in some way helps keep it contained and the contents dense enough for aerobic activity to break them down.
To heat up and cook properly, the pile should start out approximately three feet tall and wide, though over time it will shrink to about a third of its original size.

Save your food scraps and garden clippings and start a compost pile.
The Compost “Recipe”
Compost happens when four elements – nitrogen, carbon, water, and oxygen – are mixed in the correct ratios. Too much or too little of any of the four will either stop the composting process entirely or turn it into a slimy, smelly mess.
Mother Nature provides the nitrogen and carbon in the form of “browns” and “greens”.
Materials high in carbon (browns) include dried leaves, pine needles, dead plant material, aged manure, straw, shredded paper, newspaper and corrugated cardboard (no shiny paper, however), twigs, sawdust and cornstalks. Browns have a relatively low moisture content.
Materials high in nitrogen (greens) include fresh grass clippings, green plant material (healthy, not diseased), vegetable and fruit trimmings, coffee grounds, tea bags and eggshells.
Greens are high in moisture and will rot rather than turn to compost if there isn’t enough brown material. The ratio is one part green to three to four parts brown.
Start with a six- to eight-inch layer of twigs and bulky brown materials, such as wood chips, on the bottom. This allows air to circulate underneath.
Then alternate layers of green and brown, watering each layer as needed. Be sure the contents are damp but not soaking wet. The brown layers should be four to eight inches high and completely cover the green material. Don’t smush or compact the pile; there needs to be space for air. End with a top layer of brown.
Bacteria, fungi and other microorganisms will start eating the materials in the pile (they eat from the edges inwards, so the smaller the pieces, the more quickly they decompose). Different organisms are active at different times in the decomposition process, creating heat as they eat the proteins, carbohydrates and other nutrients in the materials.
There are things you shouldn’t add to a compost pile, including oils, grease, meat or fish, dairy, or any manure from a meat-eating animal. Don’t add plant material that’s infected with fungus or disease, or weeds that have gone to seed. Avoid charcoal ash and treated wood.
Maintenance
Turn the pile every three to four weeks, bringing the outside materials to the center. It should become hot in the middle, hot enough to produce steam. That’s how you know it’s turning into compost.
Weed seeds, insect larvae and disease pathogens are destroyed when temperatures reach 145 degrees Fahrenheit for a sustained period. It helps to have a compost thermometer so you can monitor how hot the pile is getting.
Fall and winter precipitation may be enough to keep the contents damp, but if the weather’s been dry for a while, check to see if the pile needs water.
Using Finished Compost
From raw materials to usable compost can take a few months. Decomposition slows down in winter, so it will take longer to get finished compost than when it’s warmer.
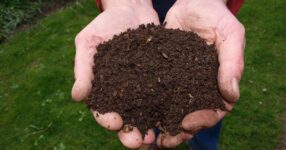
You’ll know it’s ready when it looks like brown, crumbly soil, is barely warm but not hot, and you can no longer recognize most of the ingredients. It should smell earthy, not rotted, ammonia-like or sour.
The compost at the bottom of the pile will be ready first. Shovel or rake it out, putting any uncomposted material back into the pile. You can use the compost as-is, or screen it to filter out any large pieces and to give it a finer texture.
Incorporate finished compost into the soil of flower or vegetable beds. Add it to the potting mix in containers. Or use it as a mulch. Keeping a shovelful or two in reserve to add to the next pile you build will jump start its microbial activity.


