
Finder Search Not Working macOS Sequoia? How To Fix Your Mac
Let’s face it—keeping a perfectly organized digital storage system is a pipe dream. Even with efficient naming conventions and folder hierarchies, your Mac will inevitably end up with thousands of files. Thankfully, Finder’s search function makes data retrieval a breeze, but what happens when the occasional bugs cause it to stop working?
The good news is you don’t have to sift through all your files manually. Several troubleshooting steps target the most common culprits. Just follow these steps in order.
Why Is Finder Search Not Working macOS Sequoia?
Finder search issues often tie back to Spotlight’s indexing. Misconfigured search scopes, outdated metadata, or improperly excluded directories can disrupt functionality. While updates to macOS Sequoia may expose these inefficiencies, they’re rarely the root cause. In fact, hardware factors like low disk space or high system load can also hinder the indexing process.
What To Do if Finder Search Is Not Working On macOS Sequoia
1. Rebuild the Spotlight Index
Time needed: 3 minutes
Finder uses Spotlight to index data for quick retrieval. Unfortunately, corrupt or incomplete indices can disrupt this process, leading to missing or inaccurate results. Try rebuilding the index to reset the catalog and create a clean slate for Finder to access files. Here’s how:
- Click the Apple menu icon > System Settings > Siri & Spotlight.
- Scroll down to Spotlight Privacy.
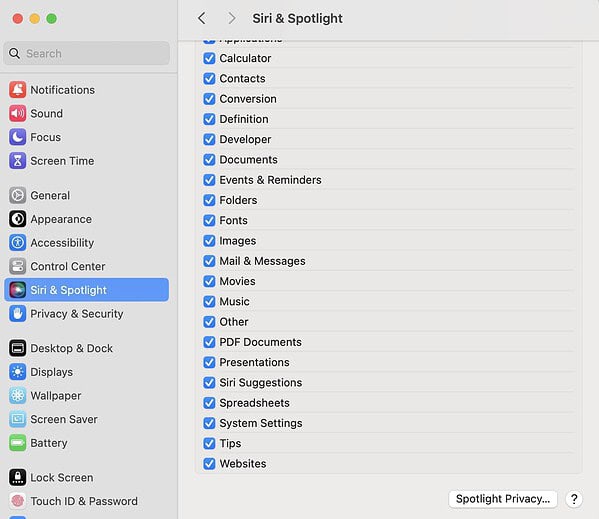

- Drag the drive or folder you want to reindex into the Privacy list.
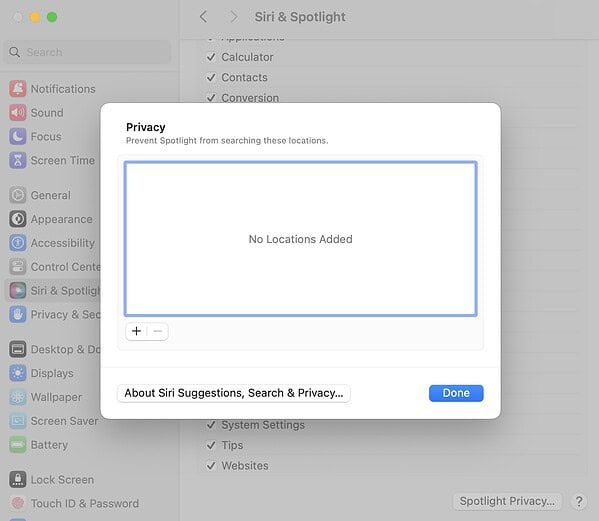

- Select the same item and click the minus symbol (-) to remove it from the list. While you’re at it, clear the Privacy list altogether.
2. Rebuild Finder’s Metadata
Corrupted metadata can disrupt Finder’s ability to retrieve and display accurate search results. It might overlook specific locations. To reset the system’s data catalog, rebuild existing metadata through the Terminal app.
- Open Terminal from Applications > Utilities.


- Type the command
sudo mdutil -Eato erase and rebuild the metadata index. - Press Return and enter your admin password when prompted.
3. Modify Finder’s Default Search Scope
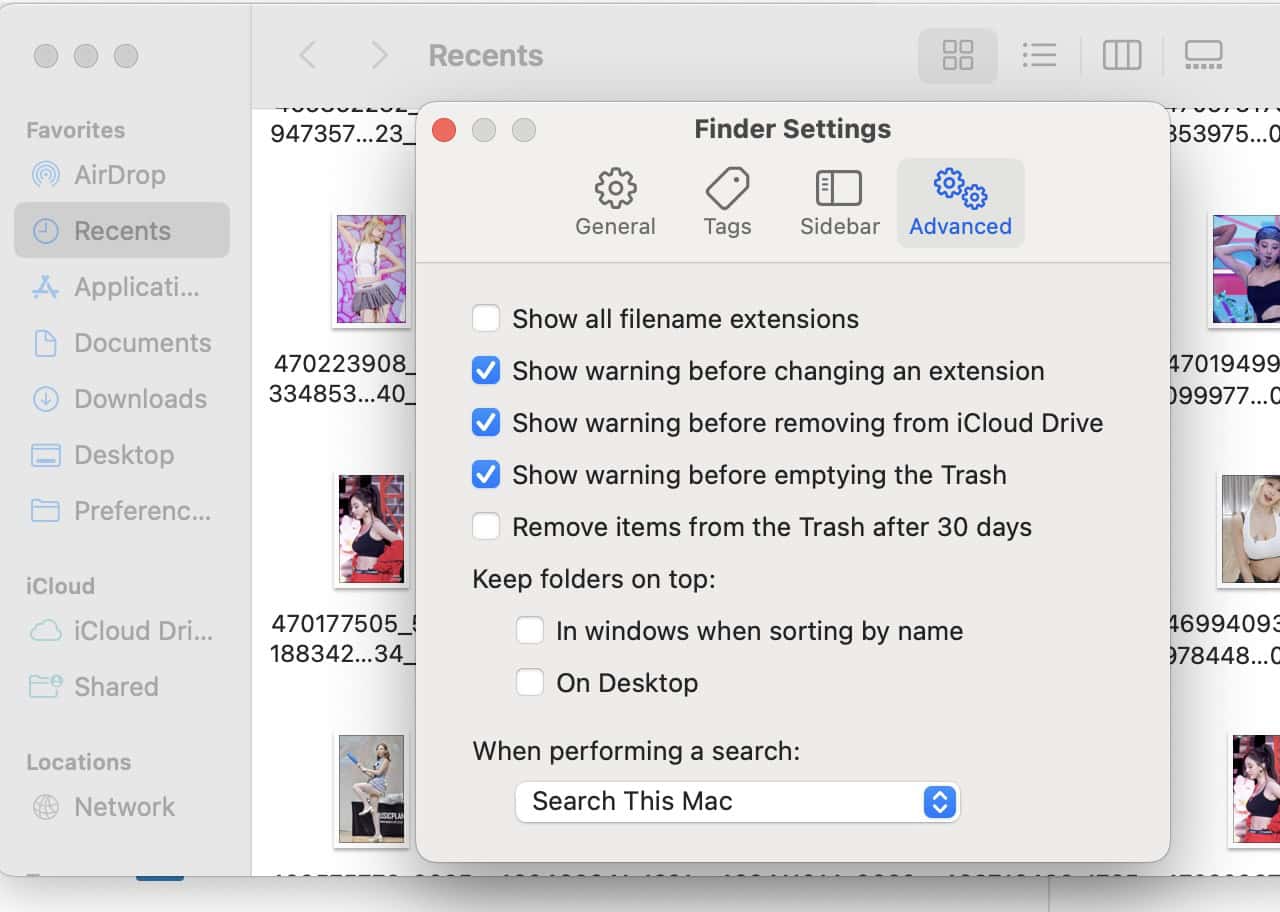
Finder’s default search scope determines where to look for files. If it’s misconfigured or restricted, the results may come back incomplete. Adjust the default scope to search the entire Mac so that no files are inadvertently excluded.
- Open Finder and click Finder in the menu bar.
- Select Settings > Advanced.
- Under When performing a search, select Search This Mac.

4. Delete Finder’s Preferences File
Check for misconfigurations in the Finder preferences. They affect different search indexing functions, from filters to results. You can try resetting your preferences to restore default configurations and eliminate potential conflicts.
- Open Finder and press Command + Shift + G.
- Input
~/Library/Preferencesand press Return.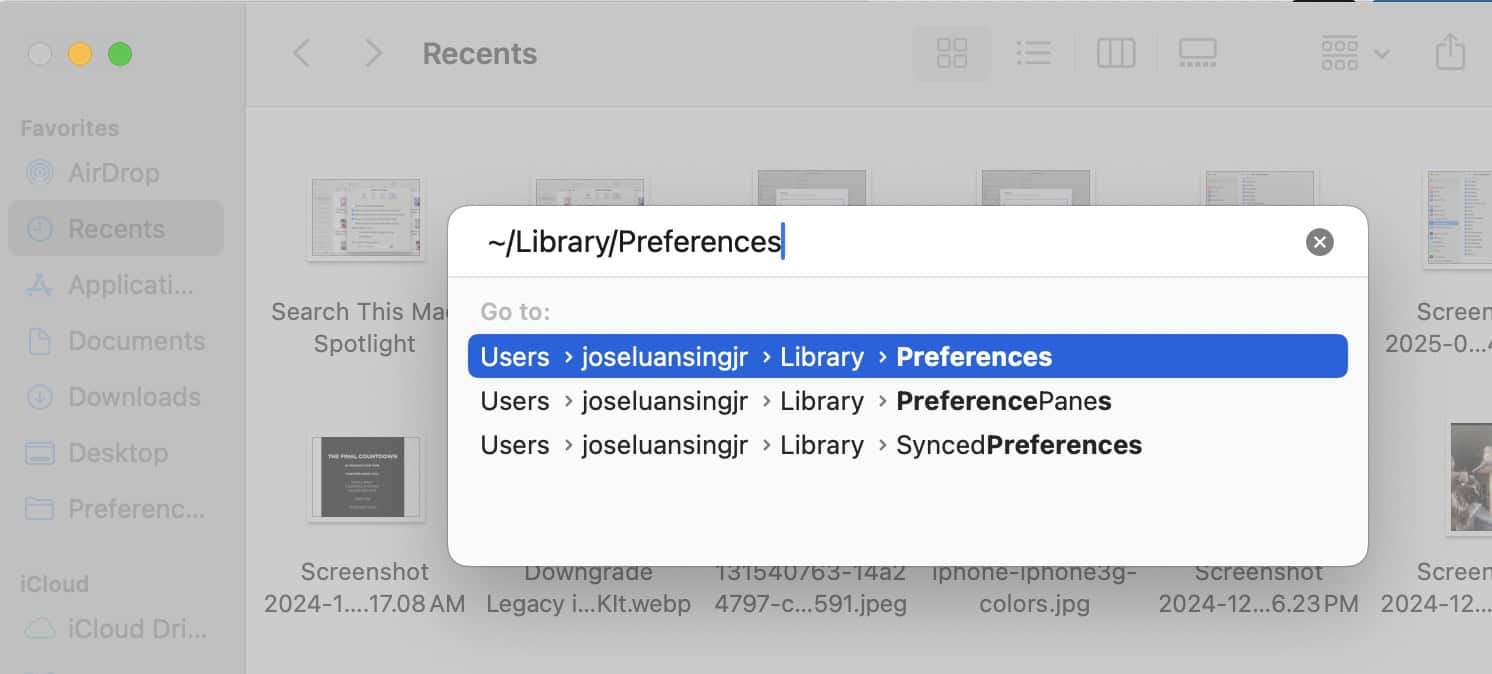

- Look for the
com.apple.finder.plistfile, drag it to the Trash, and restart your Mac.
5. Test in a New User Account
Test Finder in another account to isolate the root cause of the issue. If the search function works fine, the problem likely lies in your user profile’s settings or configurations. On the other hand, you might be dealing with system-wide or hardware-related problems if the issue persists.
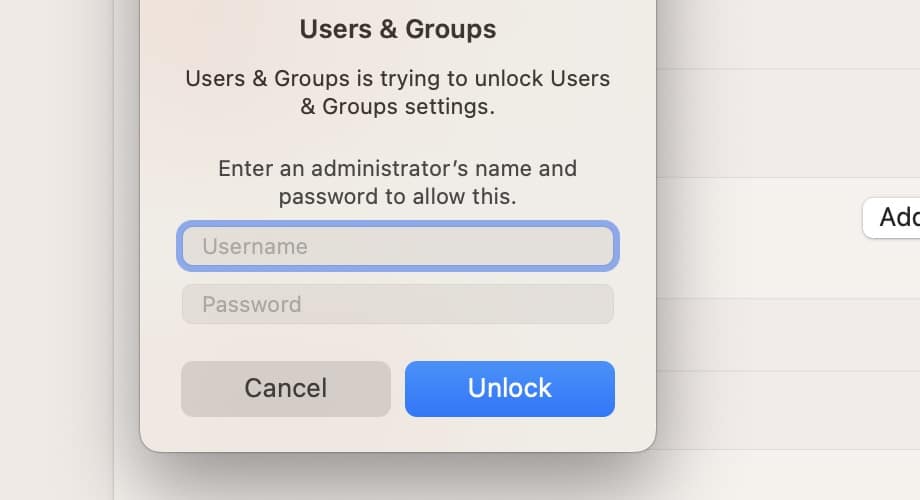
- Go to System Settings > Users & Groups.
- Click Add Account and follow the prompts to create a new Standard or Admin account.

- Log out of your current account by selecting Apple Menu > Log Out.
- Log into the newly created account.
- Open Finder and test the search functionality.
6. Update macOS
Apple frequently addresses known bugs through point releases. With multiple reports about Finder and Spotlight misbehaving since Sequoia launched, developers are likely aware of the issue and are working on it.
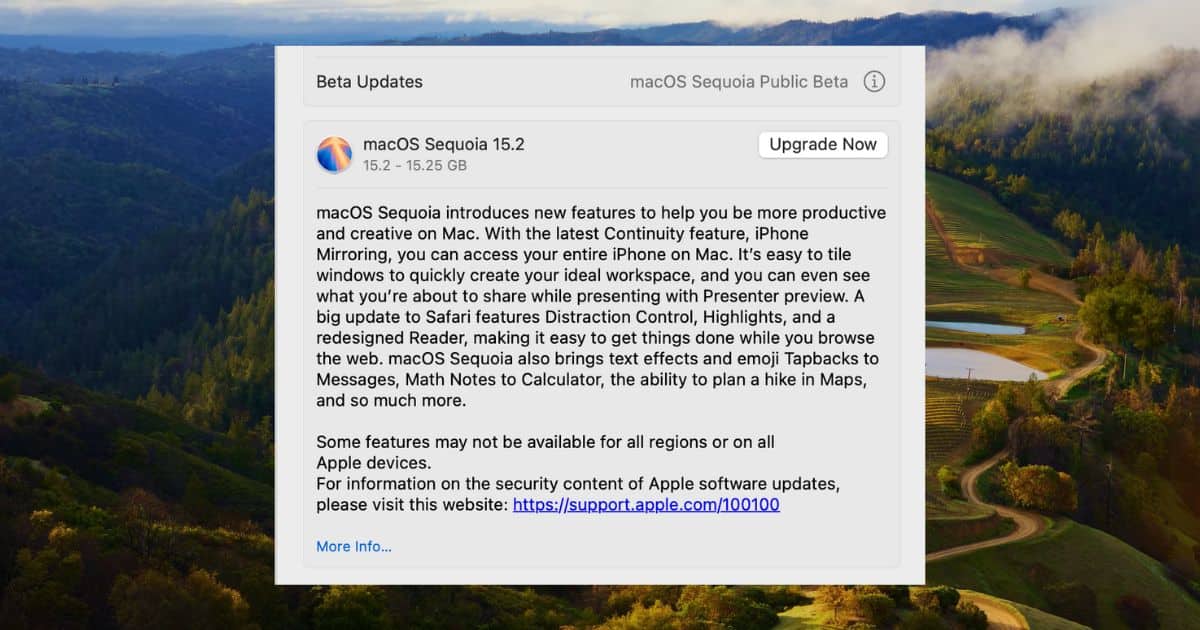
- Click the Apple menu icon > System Settings > General > Software Update.
- Select Upgrade Now if a new release is available.

7. Factory Reset Mac
You can try factory resetting your Mac as a last resort. Since you can’t pinpoint the hidden glitch or misconfiguration, revert all your settings to their defaults. Just remember to back up your data beforehand. Otherwise, you’ll lose your data for good.
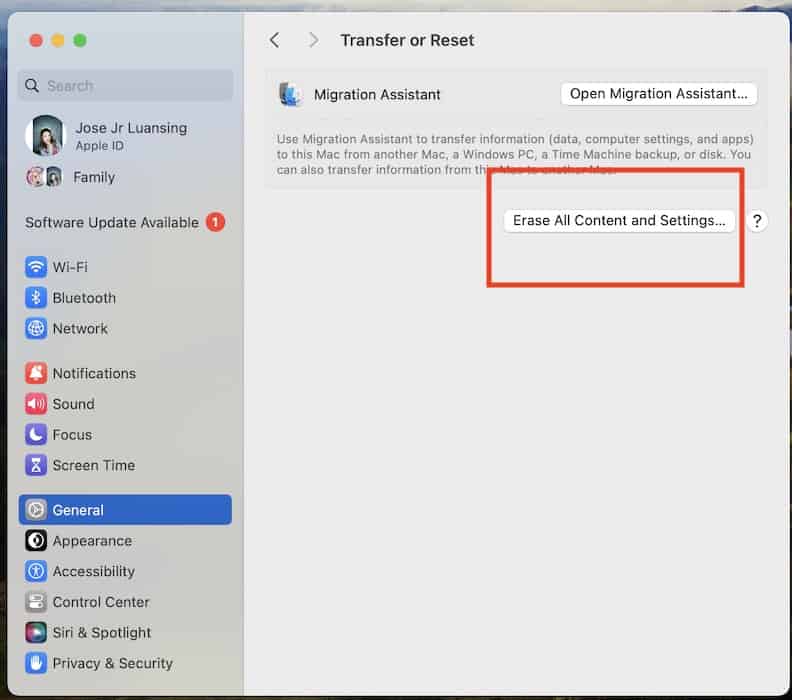
- Click the Apple menu icon > System Settings > General.
- Open the Transfer or Reset section.
- Select Erase All Content and Settings.

Call Apple Support if Finder is still acting up. We’ve already gone through all the basic troubleshooting steps, but specialists can help you pinpoint more specific software problems. They’ll also assess if you need to send in your device for repairs.


