Whether you consider the Vaonis Hestia a telescope or a monocular device depends on how you interpret its strengths and weaknesses. It’s neither a full-fledged telescope nor equipped with the kind of specialized gear Vaonis includes in its far more expensive models.
Starting at $250, the Hestia is much more affordable by comparison, though its value proposition is that it utilizes the capabilities of the smartphone you attach to it. Especially when it’s a fairly straightforward setup without the requisite knowledge of astrophotography. Even your astronomy knowledge can be limited before you point this thing at the sky.
Before I dive in, it’s important to point out that Vaonis doesn’t qualify the Hestia as a smart telescope. So, if it’s not a telescope, what exactly is it? I can’t be sure, to be honest. The company calls it an “optical system” on its website, but since it’s not all that adjustable, a monocular might be more apt in this case.

Design and Setup
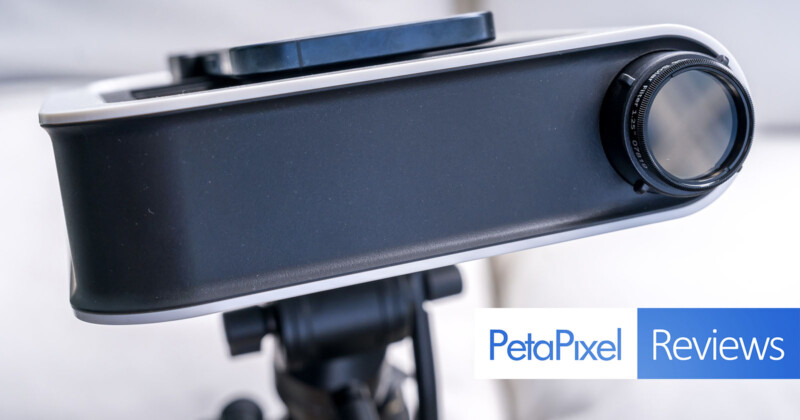
The Hestia is a passive device, meaning you don’t have to charge a battery or install firmware to get it to work. My review unit included the tripod and solar eclipse lens filter, both of which are sold separately as accessories. You could use your own tripod and attach the unit using the standard thread mount underneath, whereas the solar filter is a must for taking photos of the Sun.
The optics on the Hestia itself aren’t expansive, leaving you with a fixed 25x magnification based on Vaonis’ specs. Thus, your phone’s image sensor does the heavy lifting on actually capturing whatever it can see while peering through the viewfinder.
Two magnetic brackets keep the phone in place once you line it up with the viewfinder. They can move anywhere along the entire surface to accommodate any device, and while reasonably sturdy, could also move a little too easily if you try to make tiny adjustments in the alignment. To truly get it right, however, you need to use the Gravity by Vaonis app, which uses a green circle with a reticle to help line up the phone’s lens. It’s not a consistently smooth experience; it may take a few tries before you get it right.
Technically, you can use any lens on your phone to do this, but you’re left with a tough choice either way. A phone’s main lens usually has the best image sensor whereas its telephoto lens can add additional focal length. But since stargazing and astrophotography do better with wider apertures, the main lens also tends to win out there.
The Hestia is ultimately agnostic as to which phone you use. Android or iOS doesn’t matter, though results could vary depending on how good the optics on your phone are. I tested it with the iPhone 15 Pro and various Android phones to get a sense of the results with different devices.
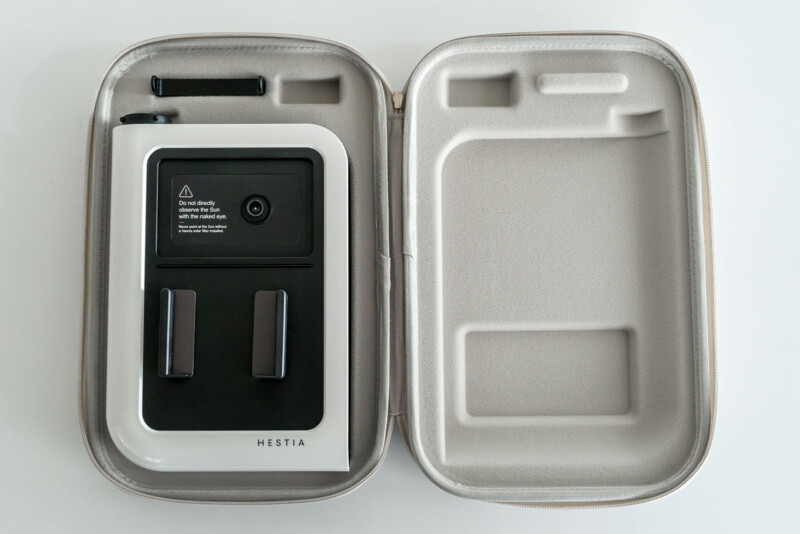
The Hestia kit has a tripod, solar filter, and solar pointer. The pointer attaches to the side to help line up with the Sun but otherwise doesn’t do anything for nighttime use. You can use the Hestia with any tripod; only this one is specially designed for the device. It’s just too bad it isn’t as sturdy as it should be, particularly when adjusting the angle and finding the right spot.
Using Gravity to Shoot for the Stars
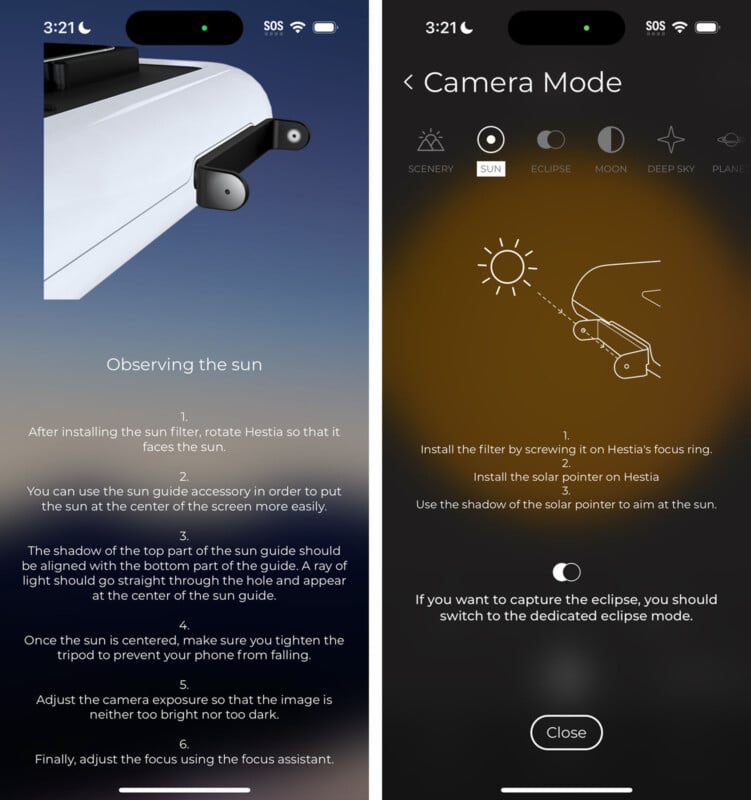
The Gravity app offers different ways to capture celestial points of interest, especially the Sun and Moon, as well as certain stars and planets. You won’t get too close to the latter because of the limited magnification, but the Sun and Moon are much easier to capture.
There are Day and Night modes, as well as specific ones for Scenery, Deep Sky, and Planet. As of this review, the iOS version offers star tracking, whereas the Android one doesn’t. Vaonis says it’s still developing that feature for Android, so the iOS app holds an edge for now. A company rep also pointed out that the app is still in “beta mode,” though upcoming updates will “enhance the overall user experience.”
Plenty of helpful tutorials and tips come up along the way, helping you better understand what to do and how to set things up to capture what you want. The most significant variable is light pollution, which naturally limits visibility but makes it more challenging to know exactly where to point for certain stars. Tap Deep Sky, and a grid of stars and systems pop up with the direction and elevation. For example, in southern Ontario (Canada), the Albireo star in the Cygnus constellation would be to the west at 287°. Each star in the app’s catalog presents this kind of info. It can tell you how to land at the right location, except the trial-and-error search only exposes the difficulty in keeping the tripod steady and smooth along the way.
The app doesn’t indicate changes to the sky using the Bortle scale, so it won’t do anything to either warn or ward off light pollution. Not surprisingly, the best results come from locations where urban lights are few and dark skies are plentiful.
Image Quality and Accuracy
I first tested the Hestia during the solar eclipse on April 8, 2024, and found it reasonably easy to use. I could do nothing about the cloud cover that unfortunately limited visibility where I was in Toronto, but I still got some decent photos. The problem I initially encountered was not fully understanding how the focusing worked.
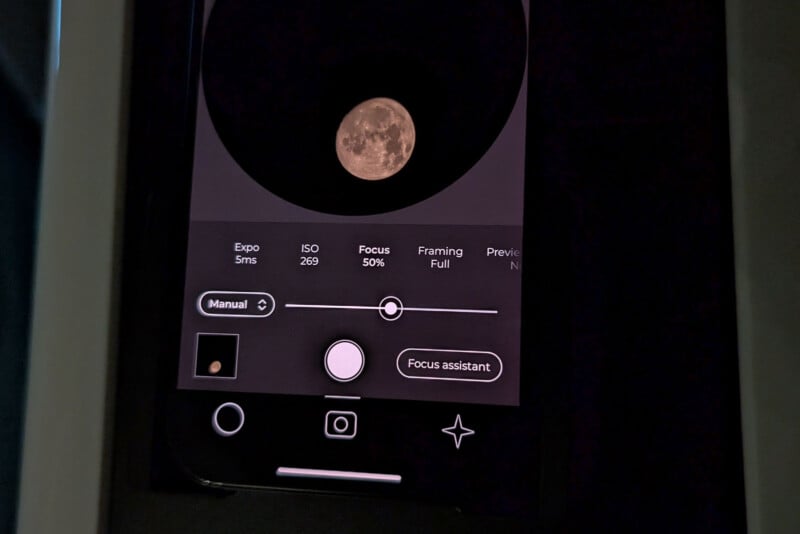
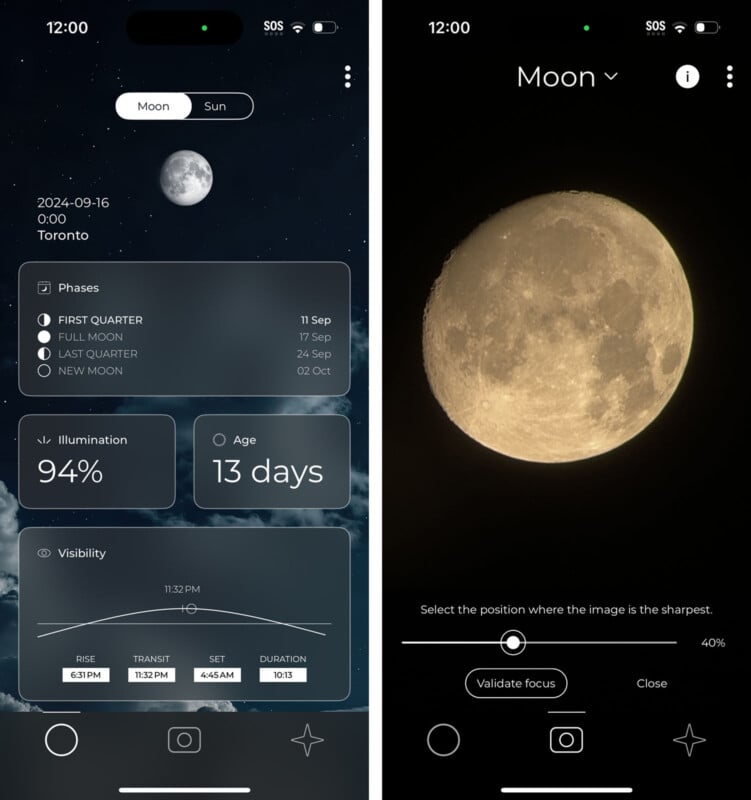
There are two ways to lock in focus, and they mainly work together. You can rotate the focus ring on the Hestia itself, but you also have to initiate the focus assistant to sharpen the subject further. The app takes a burst of shots at slightly different focal lengths, and you then choose the one that’s sharpest so you know what percentage garners the best results. I didn’t do this as effectively that day, but I also had to contend with some cloud cover and a Sun that moved quickly.

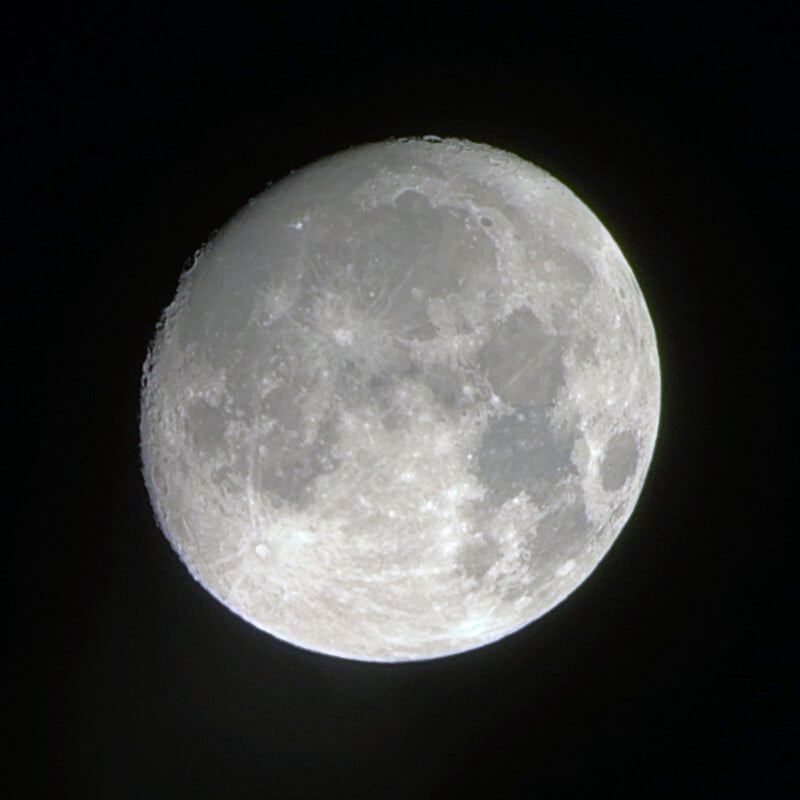
I learned the nuances and fared better later on with the Moon because it was much easier to manage. Lining it up isn’t hard, and once you find the proper focus, results can look nice, with the surface craters and textures being highly visible. Unlike the Moon photos taken from phones that offer a “Supermoon” or Moon mode, no AI or trickery is imposed on the image.

As for stars and planets, it’s hard to capture much of anything if you live in a major city’s suburbs. The app also isn’t the best way to track them down, either. You can try other apps like Stellarium and Night Sky to hone in on the exact spots, but that also requires having a second phone on you. It matters because trying to isolate subjects millions of miles away requires a lot of precision. Moving the Hestia ever so slightly can take everything out of the frame, forcing you to recalibrate.
Timelapse photography is also very tough to pull off. For one, it’s not automated, so you have to manually capture a photo every 10 seconds or so by tapping the shutter on the phone each time. That’s not fun or economical if you’re trying to capture a 60- or 120-minute timelapse. Vaonis tells me there is a chance of an automatic track accessory to alleviate that, but there’s no word on whether such a thing will ever see the light of day (or night).
Are There Alternatives?
The Hestia makes sense if you’re a real fan of capturing the Moon and Sun. It’s just that Vaonis’ other products, the Vespera 2 and Stellina, are far more advanced in comparison because they are true smart telescopes. They’re also considerably more expensive at $1,690 and $4,000, respectively. Those use the phone’s GPS to more accurately pinpoint exactly where to position the Hestia, as well as automatic tracking and the ability to save photos in various file types, including RAW and TIFF.
Otherwise, stargazing devices aren’t all that common. The Hestia is a unique product because it’s not a standalone device but a phone accessory to magnify astrophotography. The problem is that even if you use it with the phone’s built-in camera app — say, with a Pixel’s Astrophotography mode — the results won’t necessarily come out looking great. The main reason is that the magnification can throw off the phone camera’s focus, leading to blurry or out-of-focus images.
Like some other monoculars or smart telescopes, the Dwarf 3 Smart Telescope doesn’t use the phone’s optics but does require a phone to control and visualize what it sees. At $500, it’s also pricier than the Hestia, but worth considering if you prefer better glass and a larger image sensor.
Should You Buy It?
Maybe. You would have to be really into astrophotography and be willing to push the Hestia to its maximum potential to get full bang for your buck. It’s also ideal if you live where darker skies are the norm.


